Inexpensive garden fun with hypertufa pots
BY KENNETH SETZER
As published in the Miami Herald, 5/13/16.
Always on the lookout for quality plant pots that don’t cost a fortune? Making your own is cheap, fun and easy. You may never buy one again after trying this method for simulating aged, weathered alpine plant pots.
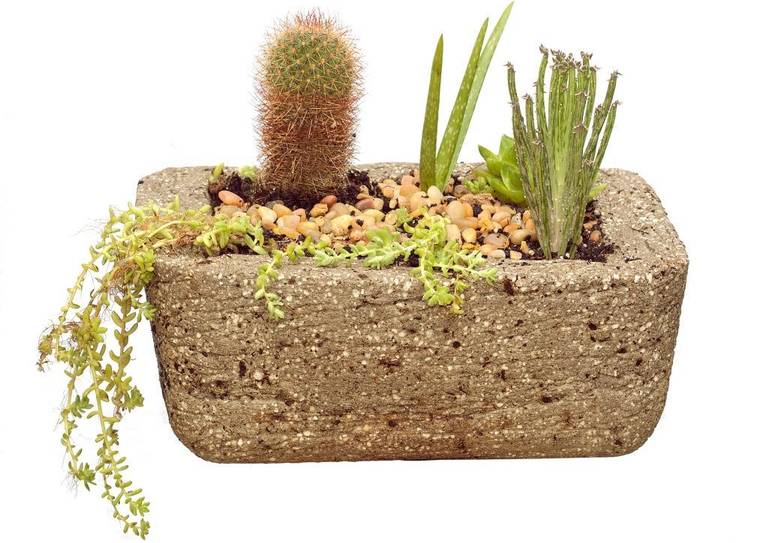
The cured and planted hypertufa pot
The material is called hypertufa and is an imitation of, predictably, tufa, which is a type of limestone. Pots, troughs, stepping stones, garden ornaments can all be made of hypertufa.
Start by mixing equal parts Portland cement, perlite, and peat moss in a large plastic container. Mix until it is all a uniform color. Add water slowly, one cup at first, and stir. Add more water and keep stirring until the mixture holds together when squeezed in your hand. A little water should squeeze out also, but the mix should not be sopping wet.
Now you will need a mold. Molds can be made of wood, plastic or similar materials, but need to be able to support the wet hypertufa mixture. Material that flexes to ease the removal of the pot is ideal. I used a plastic tub. You can use a shallow plastic bowl — turn it upside down and press the mixture around the outside. I lined the tub with plastic wrap to make certain my pot would easily separate from the mold. Then to shape a hollow on the inside, where the plants go, I used a smaller cardboard box, covering it with plastic wrap and reinforcing the interior with wood scraps.
Pour in enough wet mixture to cover the floor of the mold to about an inch. Larger pieces require correspondingly thicker floors and walls. Now place the interior mold piece — like my cardboard box — directly atop the wet mixture. Proceed to pour the mixture to fill what will become the walls, between the outer mold and the interior mold. You may need to hold the interior piece in position or weigh it down.
Use a stir stick to push the mixture down into the sides to make sure there are no gaps. Once the mold is filled, smooth the top a bit but not too much. We want the finished hypertufa planter to look weathered.
It’s essential now to wrap the entire mold in plastic; a garbage bag works well. Mist the entire assembly thoroughly and close the bag, leaving it in a shady spot out of direct light. The more slowly the drying and curing process, the stronger the pot will be. Drying too quickly will cause cracking.
It’s hard to resist a peek, but wait one day before removing your pot from its mold. It should be fairly firm at this point, but if not, wait another 12 hours or so. The plastic wrap should make this easy. Remove the inner mold as well. It may require being cut or ripped out in pieces.
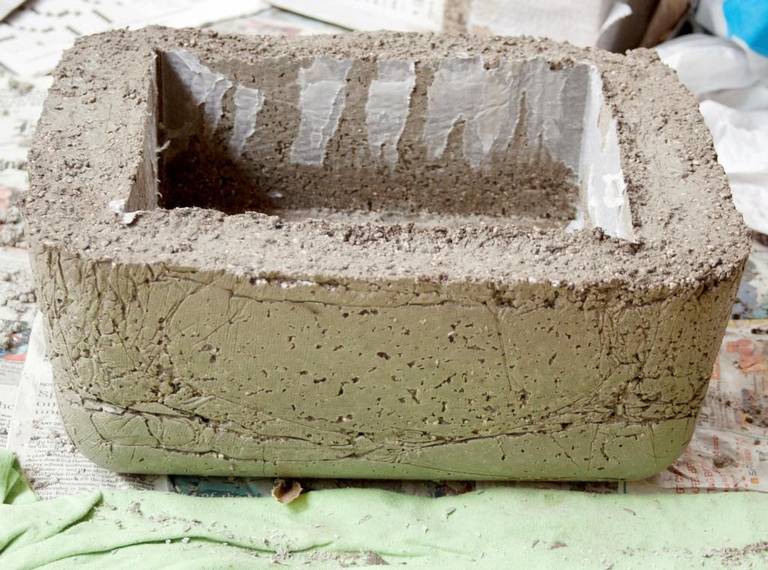
Hypertufa pot, fresh out of the mold
Thoroughly hose down the piece, and using a wire brush, firmly brush down the entire surface to remove mold lines and reveal the stone-like look of the perlite. Using a metal file, rasp or slotted screwdriver, you may choose to further age the pot and include “chisel” marks. Rounding any sharp edges also helps age the pot.
Don’t you love it? Sadly, you must be separated from your creation once again. Rinse the piece again and place it back in the trash bag. Mist the inside of the bag again, close it up and place it all in the shade for one month. This is the curing process, and the pot must remain moist this entire time. Open the bag from time to time and remist if necessary.
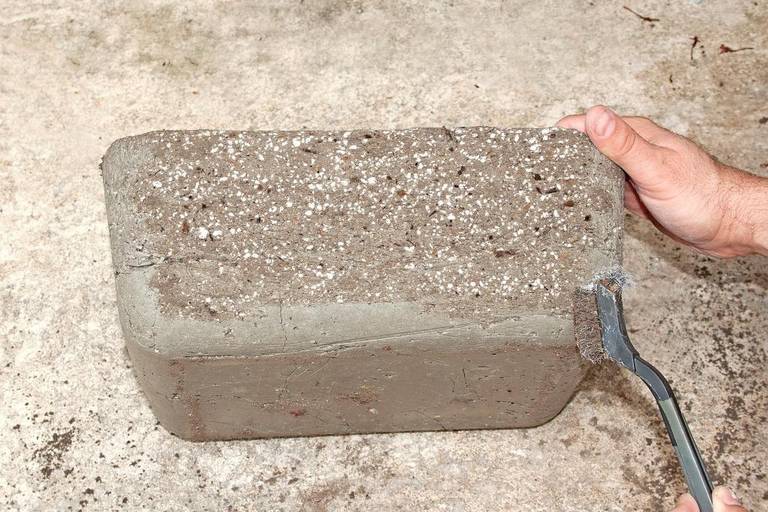
Wire brush reveals the pot's natural stone-like look.
Thirty days later, open it up, and with a masonry drill bit, carefully drill drainage holes in the pot bottom. The cement will be very alkaline for a time, which can damage some plants. Continue spraying the pot down daily for a couple weeks to leach excess alkalinity.
Succulents and cacti look particularly at home in hypertufa, but anything will work. Now you can make all the pots, stepping stones, birdbaths and decorative rocks you please!